

[ WAA Home | ProjeX Home | Download ProjeX | Help using ProjeX | ProjeX FAQ | About WAA]
Update/edit resources allocated to a task
Having initialized and attached a Resource workbook to a ProjeX sheet we will need to either add new resources or maybe edit existing resources. The menu option to do this is
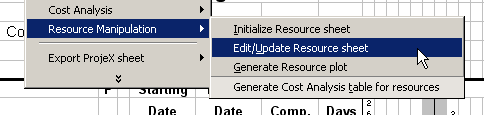
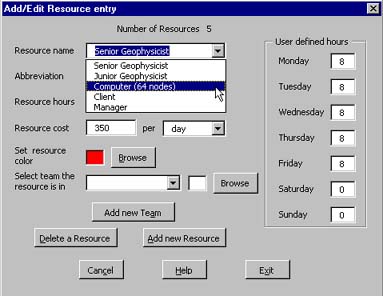
On selecting this option the following dialog pops up.
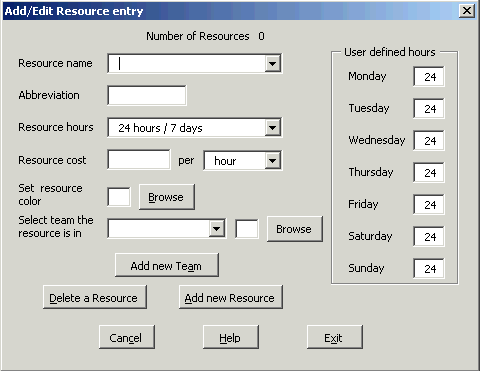
If we have already added resources to this workbook then the list of resource names will be available and the number of resources already defined detailed. Select the 'Add new Resource' option to entry new resource information, 'Exit' to save any changes/additions made to the Resource workbook or 'Cancel' to not save any changes made to the Resource workbook. The resource costing information is used in the cost analysis option and does not matter here.
The user can group resources into team in the latest version of ProjeX. That way rather than analyzing how busy various resources are, we can look at a team and the breakdown of resources within that team. Colors can also be allocated to both resources and teams. This gives us the ability to color code are task bars to show team or primary resource rather than just the amount of the task that has been completed and if any part is overdue.
Add a new resource to a Resource workbook
By clicking the 'Add new Resource' button of the resource entry dialog the user can enter the details for a new resource with the following dialog:
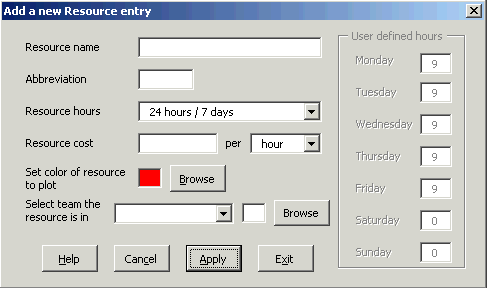
There are three basic pieces of information that define a resource in ProjeX :
Resource name - the full name that the user wants to use for the resource when generating plots (e.g. John Smith or Team1).
Abbreviation - this is how the resource will be identified on the ProjeX sheet (e.g. JS or T1). ProjeX uses this to keep track of the resource so the initials must be valid as a sheet name in an Excel workbook.
Resource hours - currently a resource can be defined as 24 hours a day, 7 days a week , this might apply to mainframe computer that can always work. There is also a user specified option this might apply to a human resource such as store which is open every day but is not 24 hour service, the hours per day can be set (with perhaps 0 for Saturday and Sunday).
Resource cost and time period - The cost of the resource is specified here in the appropriate units. These are currently per hour, per day, per week, per month, per year or the total cost of the resource.
-
The color used to plot the resource (this is used by PlaneX).
-
The team (or group) the resource is in. For example you might have several groups of employees one set in Aberdeen another in Houston and a third in London and need to show where the resource is from.
As well as the above we can define the color of the resource for plotting and also the team (optional) that the resource is allocated to. If no teams have been defined we can add them from the main 'Add/Edit Resource' dialog.
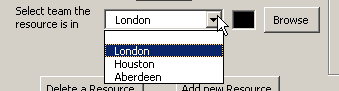
The user is then prompted to name the new team, this list of teams is stored in the resources file.
The new resource will be saved in the Resource workbook is the user selects 'Add', if you cancel out the dialog none of the information is saved.
As each resource is added you will notice a new sheet appearing in the Resource workbook. Remember we have still not allocated the new resources to any tasks.
Edit a resource in a Resource workbook
Once you have initialized a Resource workbook and entered some resources, they can be edited simply by selecting them from the list of available resources.
Have selected the resource, make the changes and then Exit.